
All of our jewellery at Claddagh Design is personally designed and crafted from the beginning sheet of sterling silver right through to the finished piece in its presentation box. If you would like to see examples of our handcrafted pieces once complete visit our Online Store here and feel free to have a browse at our finished products. The process includes many stages from sketching, cutting, and hallmarking to soldering, polishing and more besides (you can learn all about how each piece is made in this video we put together) Jewellery making, especially working with silver and other precious metals, requires a lot of equipment, training and skill. Here's just a brief overview of what the average silversmith has to do to make a sheet of metal into a stylish piece of jewellery;

Sawing
The first step is to cut out the design from the sheet of silver using a jeweller's saw. Jeweller's saws are extremely thin to allow for the best precision and detail. The saw must be lubricated to get the best results, and used with a steady, fluid motion.

Filing
Once the design has been cut out, the edges need to be filed down to make them smooth and level all around the piece. Files come in various sizes for fine or general filing. The silver is filed in one direction only, not backwards and forwards.
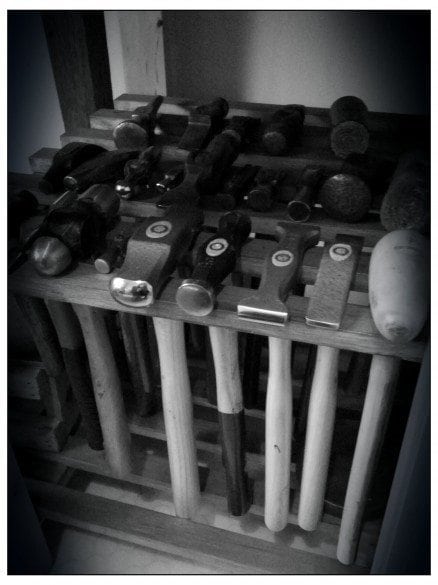

Metalwork
Depending on the complexity of the piece, shape, texture and design elements are added by various metalwork techniques. Using silversmithing hammers and various other tools, at this stage the piece begins to resemble its final state.

Soldering
Soldering means using heat to bond two pieces of metal together. It is usually a standard crafting stage in most jewellery pieces although the amount of soldering needed varies greatly depending on the piece.

Finishing
The piece is now complete apart from a few last design details. It is ready to be buffered, polished, have any remaining imperfections fixed, and made to look nice and shiny and ready to wear. You don't need all those saws and hammers to make basic, simple jewellery at home however. Here are a few straightforward techniques that, once mastered, can allow you to create pieces as complex or plain as you like.
Clay Silver
Clay silver is metal clay made up of pure silver mixed with binding agents and water. It's mouldable into any shape just like pottery clay and when treated with heat, transforms into solid silver as we know it. Clay silver is widely available online, and it's not as expensive as you would expect – around $100 for 50 grams which will make several small pieces (like earrings or pendants) or a couple of bigger pieces (like bracelets). It needs to be 'fired' over a flame, generally at temperatures of around 650oC. Stove-top burners work fine, so this is easily something that can be mastered with a little bit of creativity. The real advantage about using clay is that no matter how many times you mess it up, you can always just start from scratch again without wasting anything. It's probably the best medium for beginner jewellery makers to work in.
The steps for making silver clay jewellery are the same as above, albeit simplified. Mould the clay into the basic shape and thickness you desire and then cut the shape you want, either with a scalpel or using special silver clay stencils (also widely available online in lots of different shapes and sizes). Remember if you're making a ring, you'll need to measure the circumference of your ring finger first. At this stage you should add any design elements such as engravings or stamps to add texture. Once you're happy with the shape, thickness and design, allow the clay to dry out for as long as possible – overnight at least, preferably longer. As it dries there may be a slight roughness to the piece, so smooth it over very lightly and carefully using sandpaper; you don't want to damage any of the design you spent so long getting right. Once that's done it's time to fire the silver. For best results, turn your stovetop burner up to the highest setting and place a stainless steel mesh over it (a wire rack for cooling bread, biscuits etc. will do the job). When the wire is hot enough it will glow. At this point, take it away from the flame and let the mesh return to its normal colour. Place the silver on the mesh and return it to the flame, using a tweezers to move it if needed. Watch closely until all of the clay has burned off and only the pure silver remains. Take everything off the heat again and allow it to cool for at least 20 minutes before handling.

Wire Jewellery
This is another easy way to create original jewellery. It is slightly more complicated than moulding metal clay and requires practice, but it's still a great place to start off and the techniques you learn are a brilliant foundation for more advanced jewellery making. There are several different techniques that would take quite a while to explain in depth, so here is a brief overview of the tools needed and some basic techniques. For wire jewellery, obviously the first thing you will need is wire. Copper wire is a perfect 'starting off' material because it's cheap and very easy to work with. Sterling silver and various other precious metal wires are also available, although copper is probably the easiest to find. Wire comes in varying degrees of hardness and thickness specified by numbers, so 0 is the most pliable and the thinnest wire, and numbers 1, 2, 3, 4, and so on become less flexible and thicker.
You will also need a pair of pliers and a cutter. Again, there are several different types for different pieces of jewellery, but the most essential element your pliers must have is smooth surfaces – serrated edges will leave marks on the wire. Your cutter must cut the edges off your wire smoothly. Once you become used to working with wire, you will need hammers to mould your wires faster and complete more complex designs. Coiling is a technique that it is worth spending some time perfecting, as it allows you to get really creative with very little restrictions. The wire you wish to coil needs to be wrapped around a thicker 'core' wire. The core wire needs to be perfectly straight. Place the coiling wire in the middle of the core wire, forming a cross. Wrap the coiling wire around the core wire keeping the coiling wire as close as you can (but not so tight that you can't remove it form the core wire). For spirals, you will need both round nose and chain mail pliers. Grab the tip of the wire with the round nose pliers and slowly wrap the wire around the edge of the pliers. Once the first overlap is complete change to the chain mail pliers and hold the edge of the spiral with the side visible.
Continue to wrap the spiral, shifting the pliers every half turn so that the spiral stays tight. Wrapping is a second basic but valuable technique, used to wrap wire around other elements of the piece like stones or beads. Firstly, using the round nose pliers make a small loop a few centimetres down your piece of wire; grab the wire with the pliers and bend it to slightly less than ninety degrees before wrapping it the opposite way over the pliers. Loop the shorter piece of wire around the end of this loop to secure it and cut the excess wire off. Add the bead or stone and repeat the process again, leaving room for the securing loops.
Beaded Jewellery
Beaded jewellery is probably the easiest of these three techniques. There are endless possibilities when it comes to design, and you have the added advantage of playing with colours and textures too. You don't need any equipment apart from beads and some material to hold them together (nylon for example). If you want to use wire for this, then you'll need a pliers and cutters as outlined above. Bead boards - boards with grooves to place beads in the order which you want them to be on the piece - are helpful for designing and planning the construction of your piece, but they are not absolutely vital by any means. If you're making a piece with a string of beads, use the knotting method. Nylon or silk work best for this. Once you have gathered your string and beads, string on the first bead and tie a loose overhand knot at the start of the string.
Insert a sewing needle through the knot and push it down towards the bead until both are as close together as possible. Remove the needle and pull the string tightly to secure the bead and knot. Repeat the process for each bead you string on. Crimp beads are small metal beads that are used to secure bigger beads in place instead of knots. To use them, you will need a crimping pliers. This is a special pliers with two sections. After threading the crimp bead on to the string as close as possible to the bead next to it, place it in the crescent shaped section of the pliers and press hard. This secures it to the string. Then press it with the other section of the pliers; this takes it back to a rounded shape. Finally you will need to attach a clasp to most pieces of bead jewellery, with the exception of earrings. To do this, thread one clasp bead onto the string followed by the clasp. Put the end of the wire back through the crimp bead and then use the crimping pliers as normal. String the rest of the beads and crimp beads onto the necklace in whatever order you desire. Then repeat the process with the other end of the clasp, putting the excess wire or string back into the beads. With a little practice and a lot of imagination, you can make beautiful and personal pieces of jewellery with not a whole lot of expense or effort. There's no reason not to give it a go if you're feeling creative! You may even take some inspiration from our silversmiths work on Products.