
Last month I wrote about an order we received for silver Ogham cufflinks. These cufflinks were based on our Silver Grá cufflinks but had their own unique inscription. That's the great thing about Ogham, you can have whatever you like engraved and it will translate beautifully into this Ogham design.
I made this batch of cufflinks (twenty five pairs in total) from a sheet of silver which I measured, marked and cut out by hand. That's fifty perfect circles! In the previous post I discussed the cutting, forming and soldering of these cufflinks. Today I will show you how I engraved, finished and polished them and give you a look at the finished product. It's important to prepare the surface before beginning engraving so I start by polishing each piece making sure there are no marks of blemishes on the metal. When you get that perfect mirror finish and you can see yourself in the reflection, you know they're ready to be engraved. Here's my self portrait in a cufflink!

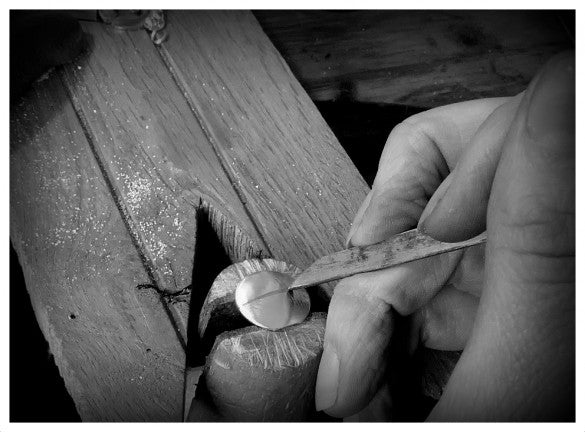
I then begin to mark out my inscription. I do this on each cufflink so that even if I get distracted I have these guidelines to follow so I won't make a mistake. It also allows me to mark out the engraving perfectly along the disc so the inscription is evenly spaced. Here is the inscription I will be engraving.


There's nothing nicer than having rows of perfectly made pieces lined up and ready to be polished and finished.

I know many silversmiths and jewellers hate the job of polishing on the lathe but once you have everything set up correctly and some good music the time flies!

And here they are, the finished 'Cork' Ogham cufflinks, ready to be delivered to their new homes.
